ㅁ 개요
O 프로그램 소개
- 이번 글은 이전글(플러터 앱개발 환경설정부터 앱출시까지 빠르게 해보고 전체과정 이해하기 - 1. vscode 에서 플러터 개발환경 구축하기 - 1.flutter 다운로드 및 환경설정/2.크롬설치)에 이은 3번째 글로 vscode로 플러터를 이용하여 앱 개발환경을 구축 중 3.vscode 설치 및 세팅하는 방법에 대하여 알아보겠습니다.
O 완성된 프로그램 실행 화면
>flutter doctor 명령 실행 시 모두 초록색으로 만족하면 vscode로 플러터를 이용하여 앱 개발환경구축이 완료됩니다.

아래와 같은 개발환경을 구축해야 합니다.
-cmd 등에서 아래 명령으로 확인할 수 있습니다.
>flutter doctor
1.flutter 다운로드 및 환경설정
2.크롬설치
3.vscode 설치 및 세팅
4.안드로이드 스튜디오 설치
5.안드로이드 툴체인(라이선스 체크)
ㅁ 세부 내용
O 주요 내용
3.vscode 설치 및 세팅
vscode를 설치하기 전에 먼저 'flutter doctor'를 점검해 봅니다.
아래 확인해 보니 우리는 플러터와 크롬은 설치되었는데,
아직 안드로이드 툴체인, 비주얼 스튜디오, 안드로이드 스튜디오가 설치되지 않은것을 볼 수 있습니다.


그리고 기본을 설치를 진행합니다.

다시 'flutter doctor'로 점검해 보니, vscode가 잘 설치된 것을 볼 수 있습니다.

vscode에서 flutter를 사용할 때 편리한 기능을 제공하는 확장프로그램들이 많이 있습니다.
이 중에서 가장 많이 사용하고 유용한 flutter을 아래와 같이 설치해 줍니다.
확장프로그램 > 검색창에 'flutter' > Flutter앱 install

아래와 같이 탐색기에서 플러터 프로젝트 폴더를 하나 만들어 줍니다.

이제 플러터 프로젝트를 아래와 같이 만들어 줍니다.
>flutter create 'project이름'
그런데 에러가 발생했습니다. 확인해 보니, 플러터 설치 파일이 포함된 경로(저는 C:\flutter)에서 프로젝트 생성 명령을 실행하면 안되는데, 해당 경로에서 명령을 실행하여 실패하였습니다.
다시 위에서 만든 플러터 프로젝트 폴더로 이동 합니다.
>cd ..\flutter_project
여기서 다시 프로젝트 생성하니 에러없이 잘 만들어 진것을 볼 수 있습니다.

생성한 프로젝트 'flutter_test1' 의 폴더에 가보니 관련 파일들이 잘 생성된 것을 볼 수 있습니다.

이제 우리는 주로 vscode로 코딩을 할 것이므로 위에서 만든 프로젝트를 vscode의 작업 영역으로 할당해 주겠습니다.
아래와 같이 File > Add Folder to Workspce..를 클릭 후

위에서 만든 생성된 프로젝트 폴더를 선택해 줍니다.

아래와 같이 vscode에 위에서 생성한 프로젝트가 잘 등록된 것을 볼 수 있습니다.
플러터의 경우 기본적으로 가장 중요한 파일이 4가지가 있으며, 우리는 초보이므로 익숙해질때까지 이 4개 파일을 항상 오픈해 놓겠습니다.
1. main.dart : 메일 소스파일로, 모든 프로그램 코딩을 여기서 부터 시작합니다.
project_test1 > main.dart

2.pubspec.yaml : 관련 모듈, 패키지를 설치/삭제 등 관리하는 파일입니다.
project_test1 > pubspec.yaml

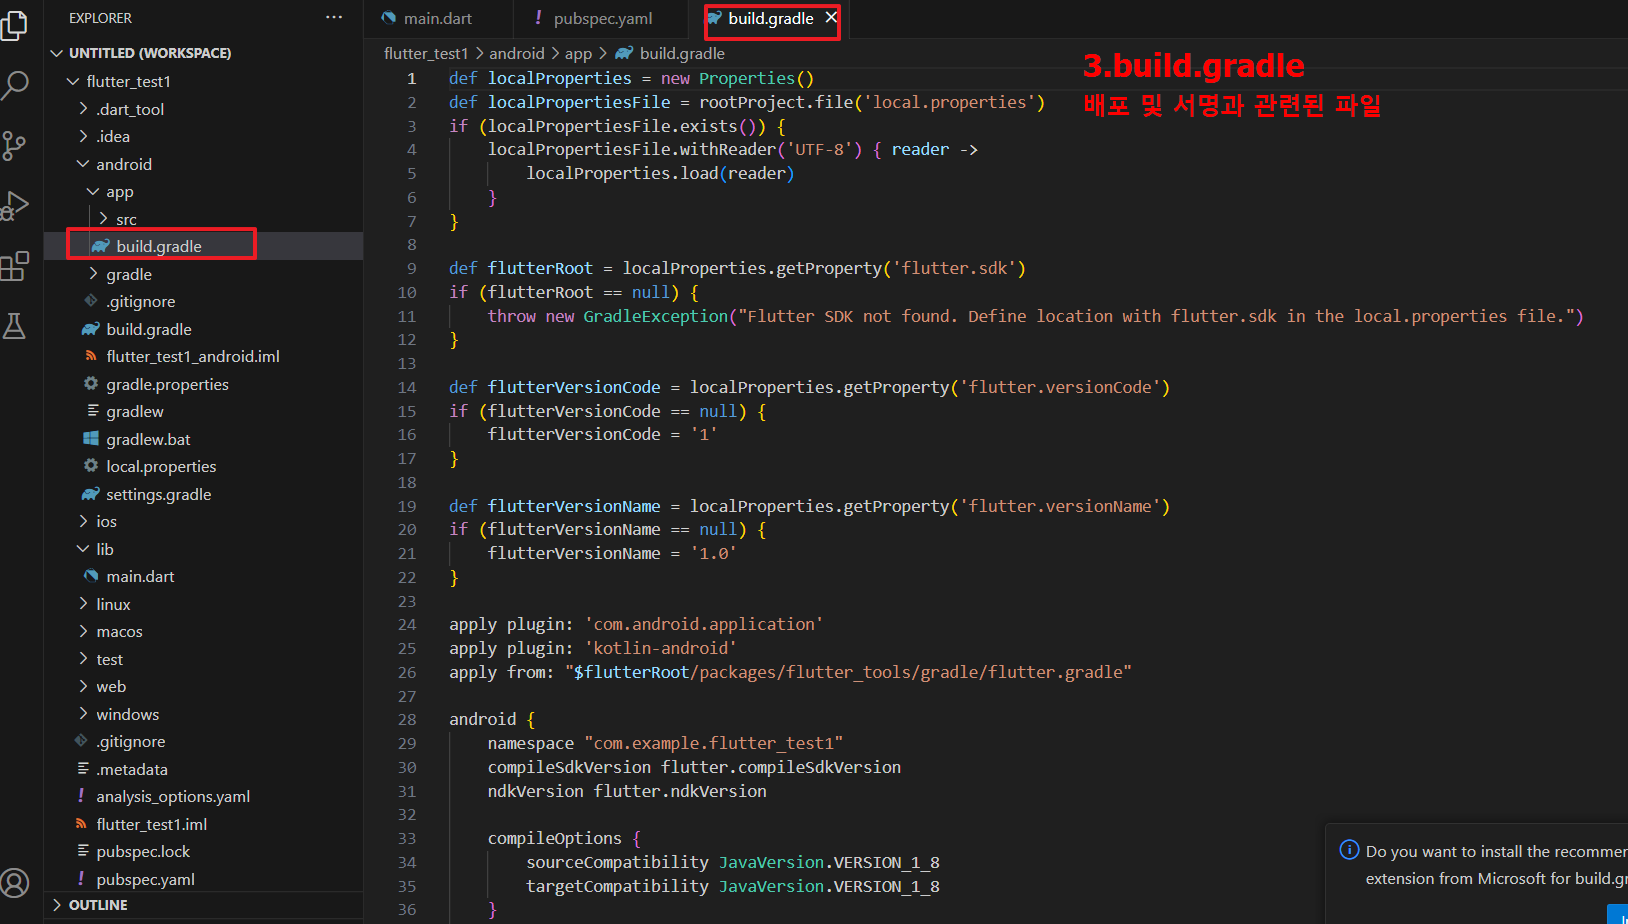
3.build.gradle : 배포 및 서명(해시)과 관련된 파일입니다.
project_test1 > android > app > build.gradle
4.AndroidManifest.xml : 배포, 패키지명 등과 관련된 파일입니다.
project_test1 > android > app > src > main > AndroidManifest.xml

프로젝트(기본앱)를 아래와 같이 실행해 보겠습니다.
Run > Run Without Debugging

에러가 발생했습니다. 메시지를 보니 안드로이드 스튜디오를 설치해야 할 것 같습니다.

다음편에서는 '안드로이드 스튜디오 설치'를 알아 보겠습니다.
오늘은 여기까지이며, 댓글과 하트는 제가 이글을 지속할 수 있게 해주는 힘이 됩니다.
위의 내용이 유익하셨다면, 댓글과 하트 부탁드립니다.
감사합니다.